
How to Decorate a Narrow Hallway Wall: Smart Tips
Key Takeaways
- Use visual tricks like light paint, mirrors, layered lighting, and low-profile storage to make a narrow hallway feel wider and brighter;
- Keep art streamlined by choosing fewer, larger frames or cohesive grids, and aim for eye-level placement with consistent spacing;
- Choose depth-conscious details such as picture ledges under 3 inches, slim hooks, and flush sconces to maintain a clear 36-inch path;
- Renter-friendly wins: Mixtiles peel-and-stick frames let you plan, hang, and reposition a gallery wall without nails or wall damage.
If you have wondered how to decorate a narrow hallway wall without making it feel cramped, you are not alone. Hallways are tight, low-light, high-traffic spaces, yet they are prime real estate for personality. In this guide, you will learn space-smart color choices, art layouts that look clean, and depth-conscious decor that opens up a corridor. We will also share renter-friendly, nail-free ways to build a gallery wall with Mixtiles adhesive, repositionable photo frames, so you can design boldly and adjust easily.
Create a gallery-worthy hallway in minutes. Upload your photos to design a beautiful photo gallery wall, and choose from our stylish photo tiles that stick up in seconds, no nails and no damage.
Why are narrow hallway walls tricky, and how do you work with them?
Narrow hallways struggle with limited width, visual interruptions like doors and switches, and low natural light. The fix is to treat walls as your primary design surface, keep the floor path clear with a slim runner, and use light, reflection, and tidy art grids to expand the look of the space.
What colors and finishes make a tight hallway feel bigger?
Light, softly painted walls and slightly deeper trim create contrast without heaviness. Add subtle texture with paneling and pick sheens that bounce light, then use a deeper end-wall color to shorten the tunnel effect in a long narrow hallway.
Paint strategies that visually widen
Choose a light, neutral wall color so the corridor feels airy. A white or pale greige on walls paired with a slightly deeper trim or wainscoting adds structure. Tone-on-tone picture-frame molding or board and batten can add depth without cluttering small spaces.
Sheen and texture tips
Use eggshell or satin on walls to reflect light in a gentle way. Semi-gloss on trim and doors frames the corridor and adds a crisp, clean look. If the ceiling is low or the hall is dark, keep the ceiling painted white to lift the space visually.
When a moody accent works
Paint the wall at the end of a long hallway in a deeper color like black, deep green, or navy. This brings the far wall visually closer, so the corridor feels shorter and more like a connected room than a tunnel.
Can you hang a gallery wall in a narrow hallway without clutter?
Yes, you can. Keep frames cohesive, stick to simple layouts that read clean as you walk, and maintain tight but consistent spacing. Mixtiles make it easy to try a grid, live with it, then restick if you want a new look. For more layout inspiration tailored to tight corridors, explore our hallway gallery wall ideas.
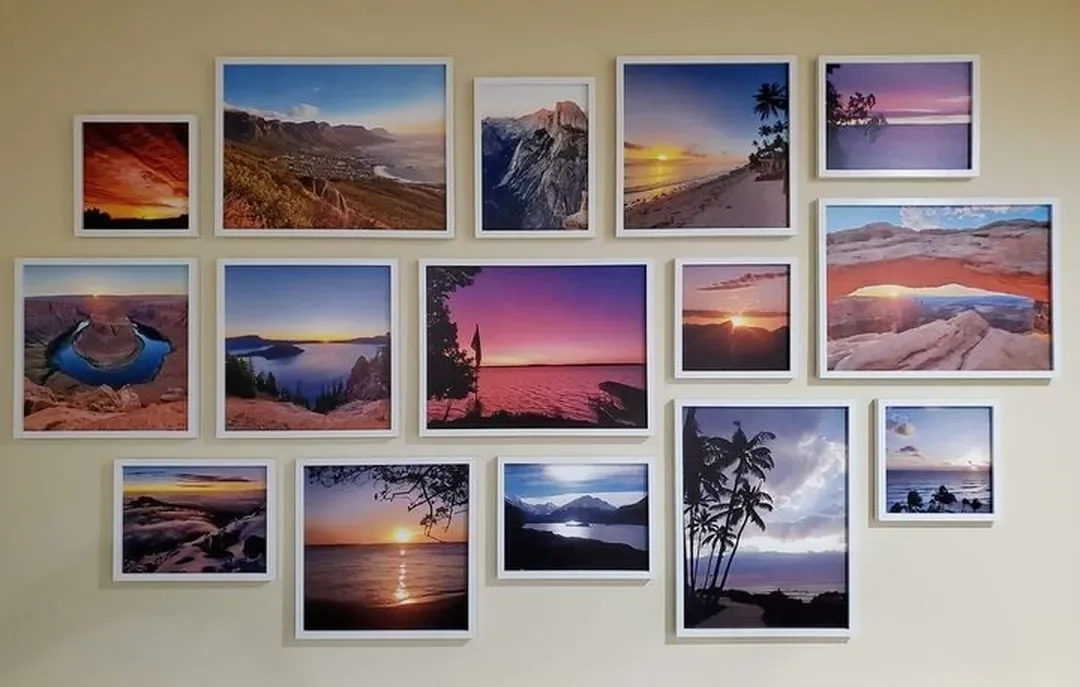
Keep it cohesive
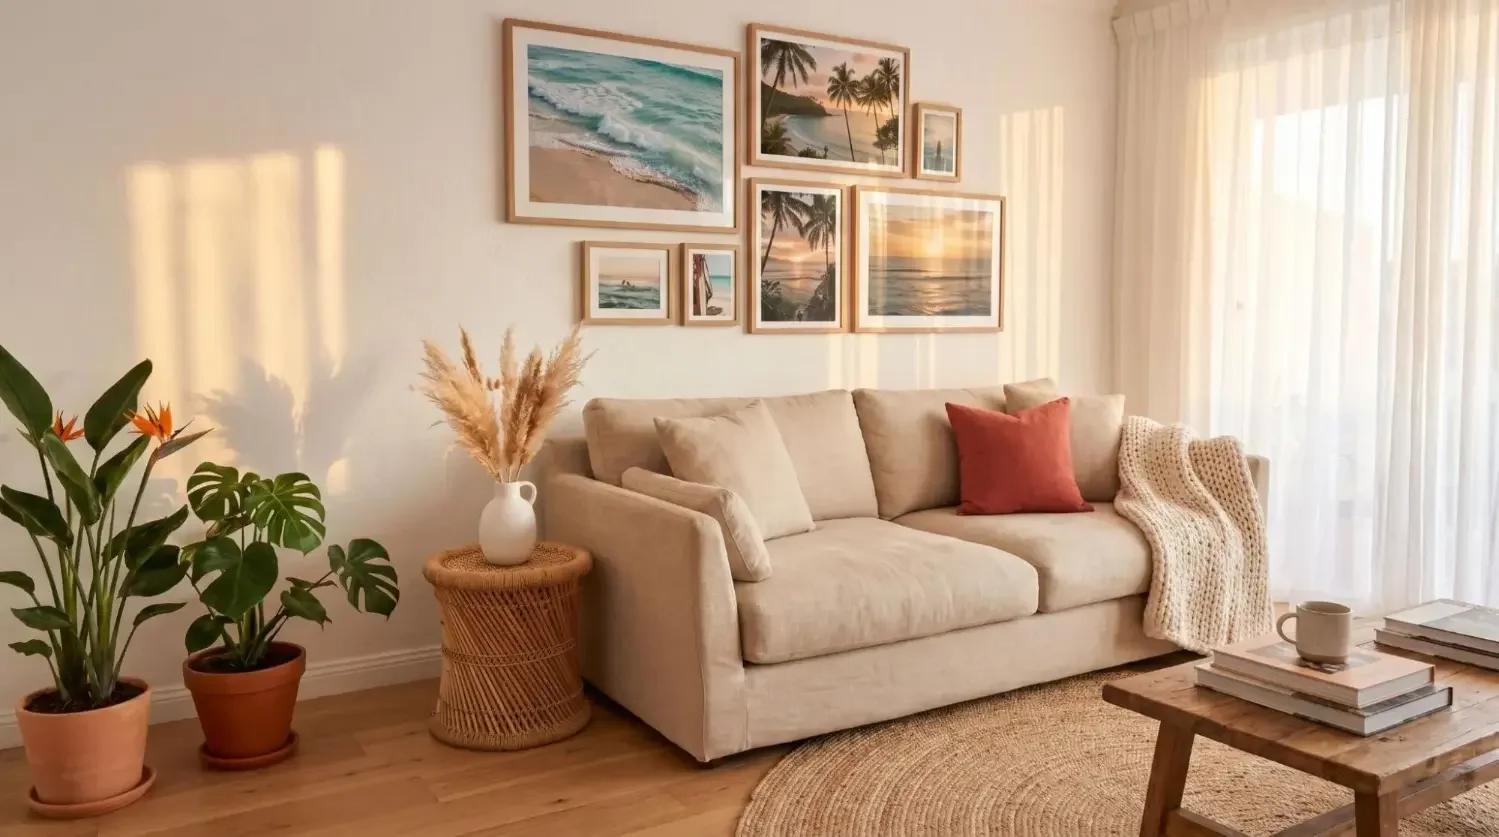
Pick one frame style and color for a calm look. If you mix sizes, limit yourself to two or three. Larger tiles read clearer as you move down the corridor and make a small space feel intentional.
Clean, calm layouts that read well in motion
Linear rows and symmetrical grids work best in a narrow space. Repeated pairs down the wall also look beautiful, especially between bedroom doors or along one uninterrupted side of the corridor.
Try these spacing rules
|
Scenario |
Recommended Measurement (inches) |
Recommended Measurement (cm) |
|---|---|---|
|
Center height for most frames |
57 to 60 |
145 to 152 |
|
Gap between frames in a row or grid |
2 to 3 |
5 to 7.5 |
|
Popular Mixtiles tile size for halls |
8.4 × 8.4 or 12.44 × 12.44 |
21.35 × 21.35 or 31.6 × 31.6 |
Still choosing tile dimensions? Use our wall art size guide to pick proportions that feel balanced in a narrow corridor.
Sample Mixtiles layouts for narrow halls
Try three square tiles in a straight row for a clean panorama. For family storytelling, a five-across strip looks sleek along a long wall. If your hallway is a bit wider, a tidy 2 by 3 grid creates a beautiful focal panel. On a stair run, follow the angle with a gentle step-up pattern.
How do mirrors, lighting, and floors help your hallway walls feel wider?
Mirrors bounce light and create depth, layered lighting removes shadows, and the right runner guides the eye. Together they help a small corridor look like part of your living room, not a dark pass-through.
Mirrors that multiply light
Place a tall mirror at the end of the hall to pull light forward. On a side wall, position a mirror opposite a doorway or window so you can see borrowed light dancing across your walls.
Layered lighting without bulk
Use low-profile flush mounts along the ceiling for even light. Add shallow wall sconces only if you can maintain at least 36 inches of clear width. Put lights on dimmers so the space feels welcoming day and night.
Floors and ceilings that guide the eye
Lay a soft runner to add color and comfort underfoot. Avoid loud vertical stripe rugs that can make a long hallway feel even longer. If you add ceiling planks, keep them light so the corridor stays bright.
What space-saving wall storage actually looks good?
Choose shallow and streamlined solutions. Picture ledges, slim hooks, and recessed niches can add function while keeping a safe, comfortable walkway.
Slim solutions that respect clearance
Use picture ledges under 3 inches deep for small frames and art. Add a skinny rail with hooks for keys and bags. Floating mail shelves can keep everyday things tidy near a door.
Between-stud niches
Where possible, recess cubbies between studs so you gain storage without protruding into the hallway. A painted niche with a small plant or art can double as wall decor.
Safety first
Maintain at least a 36-inch clear corridor. Avoid sharp corners at shoulder height. If your house has a very long hallway, repeat elements at intervals for rhythm rather than cramming one area with decor.
Design, preview, and order your nail-free hallway art. Our canvas prints arrive ready to stick and can be repositioned any time, making it easy to turn your favorite memories into beautiful decor.
How high should you hang frames in a hallway, and what about stairs?
For most walls, place the center of each picture at 57 to 60 inches so art sits at a natural eye level. If you need a refresher on how high to hang art on a wall, this guide covers exceptions and special cases. On a long wall, align tops or centers across frames to create a satisfying sightline.
On stairs, keep the centers of frames parallel to the handrail angle so the gallery wall climbs smoothly. For more step-by-step tips, see how to hang large art on a staircase.
How do you plan, measure, and install, fast and renter-friendly?
Map your design on the floor first, tape the layout on the wall, then install with Mixtiles for a quick, damage-free makeover. You can adjust spacing and height without starting over.
Map it out first
Measure the wall height and width. Note switches, railings, and vents. Place tiles on the floor to preview your gallery. Use painter’s tape on the wall to outline sizes so you can see the composition in your home.
Install the easy way with Mixtiles
Follow these quick steps for a clean install:
- Prepare the wall by wiping away dust and letting fresh paint cure per manufacturer guidance;
- Mark the centerline and eye-level height, then place your first tile at the center of the layout;
- Peel the adhesive, press firmly for a few seconds, and use a small level for grids or straight rows;
- Add remaining tiles, maintaining 2 to 3 inches between each piece;
- Adjust any tile by gently lifting and resticking until everything looks perfect.
Care and upkeep
Dust frames with a dry, soft cloth. Choose a washable runner for easy cleaning in high-traffic hallways. If a tile needs to move to another room, cover its adhesive with wax paper for storage, then reuse when ready.
Want plug-and-play style recipes for different hallway vibes?
Match your gallery wall to your home design. Whether you like crisp white and black minimalism or warm, traditional decor, consistent framing and simple spacing make every style look intentional.
Minimal and airy

Line up three to five black-and-white Mixtiles in a straight row. Pair with white walls, soft green plants, and a pale rug so the space feels bright and open.
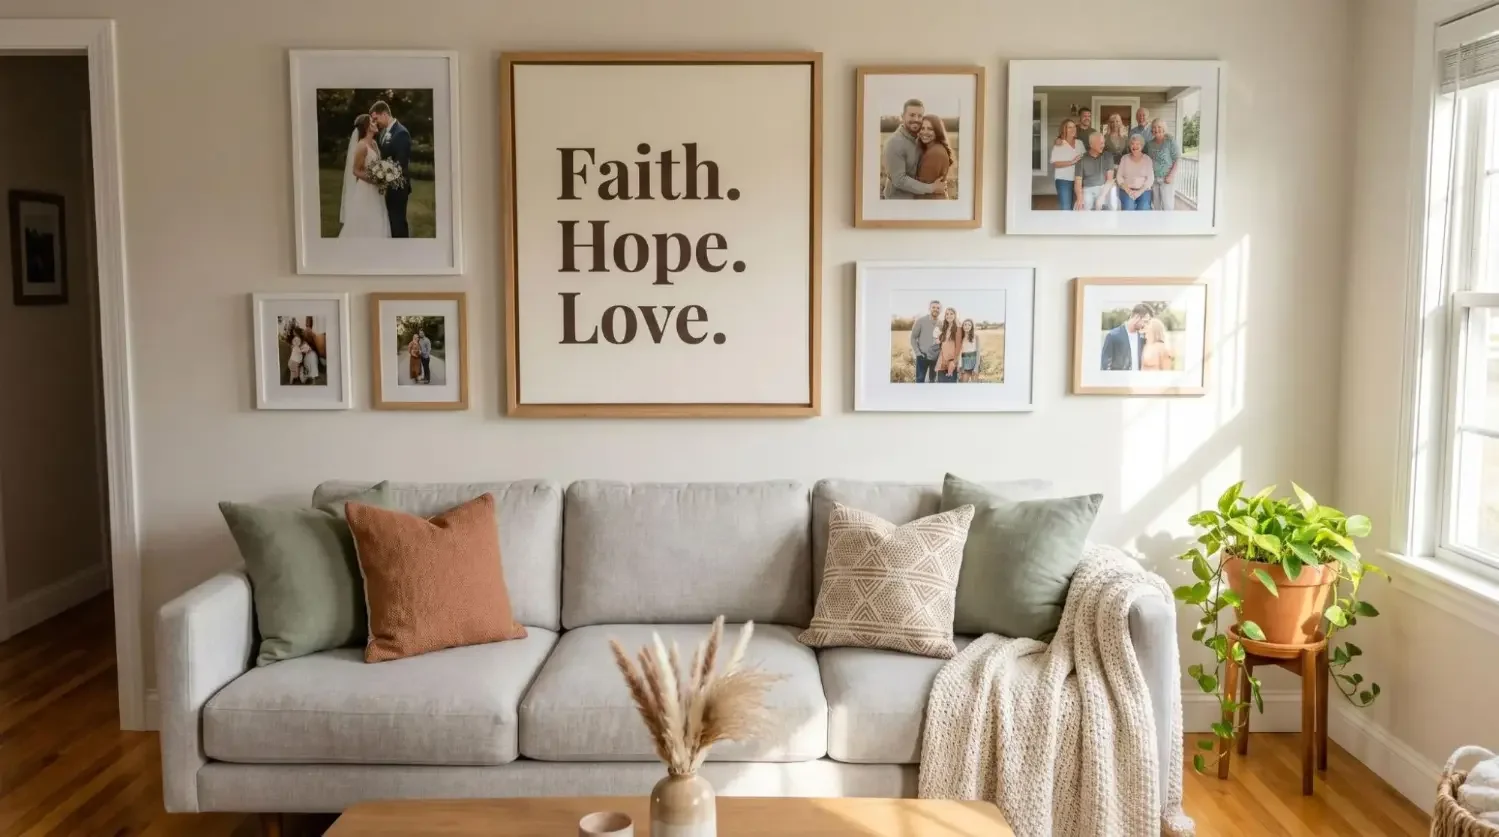
Warm and traditional

Create a 2 by 3 grid of family portraits with medium borders for a timeless look. You can even create a unique AI family portrait for a truly special touch. Add a runner in muted colors and good lighting so faces glow in the corridor.
Scandi and family-friendly

Use a slim picture ledge with four to six colorful tiles above. Mix natural wood tones, a light runner, and playful art so the hall looks fun and lived-in.
Bold and moody

Paint the end wall a deep green or black. Hang a linear set of high-contrast travel photos and place a tall mirror to reflect light back toward the entryway.
What mistakes should you avoid on a narrow hallway wall?
Before you start your hallway makeover, watch out for these common pitfalls so your space will look balanced and beautiful.
- Overcrowding with many tiny frames that create visual noise;
- Using deep shelves or bulky consoles that shrink the walkway;
- Relying on one dim ceiling light instead of layered lighting;
- Choosing high-contrast vertical stripe runners that exaggerate the corridor length;
- Ignoring the end wall instead of creating a good focal moment.
Learning how to decorate a narrow hallway wall comes down to optical ease: lighter walls, reflective moments with mirrors, layered lighting, and streamlined gallery layouts that look great in motion. With Mixtiles peel-and-stick frames, you can create a cohesive gallery wall, move tiles around as your art evolves, and keep walls clean. Start small with a three-piece row or build a tidy grid near a bedroom door. Your corridor will feel like part of your living room in no time.
Transform your narrow hallway wall today. Explore our collection of wall arts and build your Mixtiles set in the app. Peel and stick for a stress-free update with free shipping.
Frequently Asked Questions
How can I make a narrow hallway feel inviting without clutter?
Keep the floor clear with a slim runner, add layered lighting with flush mounts and dimmers, and choose one simple focal moment like a mirror or a clean photo row. Repeat a tidy rhythm along the wall for calm, cohesive movement.
What should I hang on a narrow hallway wall?
Opt for cohesive photo frames in a straight row or compact grid, a mirror placed to catch light, and shallow picture ledges under 3 inches. Choose fewer, larger pieces for clarity. Mixtiles peel and stick frames are renter friendly and easy to reposition.
How do I make a narrow hallway look wider?
Paint walls in light tones with eggshell or satin sheen to bounce light, keep ceilings white, and consider subtle horizontal stripes. Add a tall mirror at the end to create depth, and use even lighting to erase shadows that make walls feel closer.
What paint colors work best in a narrow hallway?
Try warm white, pale gray, or soft pastels like mint, blush, or lavender to brighten and open the space. Use slightly deeper trim for gentle contrast, and in long corridors consider a deeper end wall to reduce the tunnel effect.
Be the first to know — deals, news & decor ideas.
By clicking you agree to the Terms of Use & Privacy Policy